

Install Indian Hair Extensions: 90% Success Guide 2026
Installing Indian hair extensions yourself sounds simple until you face unnatural looks, slippage, or damage that cuts lifespan by nearly a third. Poor technique wastes money and frustrates even experienced stylists. This guide delivers preparation essentials, proven installation methods, safety protocols, and maintenance strategies to help you achieve salon-quality results at home while protecting your natural hair and maximizing extension longevity.
Table of Contents
- Prerequisites And Preparation
- Step-By-Step Installation Methods For Indian Hair Extensions
- Safety Considerations And Common Mistakes To Avoid
- Care And Maintenance Post-Installation
- Troubleshooting Installation Issues And Expected Outcomes
- Discover Premium Indian Hair Extensions At Gaurash Beauty Supply
- FAQ
Key Takeaways
| Point | Details |
|---|---|
| Proper preparation reduces installation errors | Clean, dry, detangled hair and quality tools minimize damage risk and improve adhesion. |
| Multiple methods suit different needs | Tape-in, sew-in, clip-in, and fusion techniques vary in time, lifespan, and skill requirements. |
| Temperature and product choices prevent damage | Fusion heat above 180°C raises damage risk; oil-based products compromise tape adhesive. |
| Correct maintenance extends lifespan significantly | Gentle washing, limited heat styling, and professional touch-ups boost extension life 20-40%. |
| Professional installation delivers higher satisfaction | Expert application achieves over 90% satisfaction versus 65-70% for unsupervised self-installation. |
Prerequisites and Preparation
Your installation quality depends entirely on preparation. Skipping this phase invites tangles, adhesive failure, and uneven blending that screams artificial.
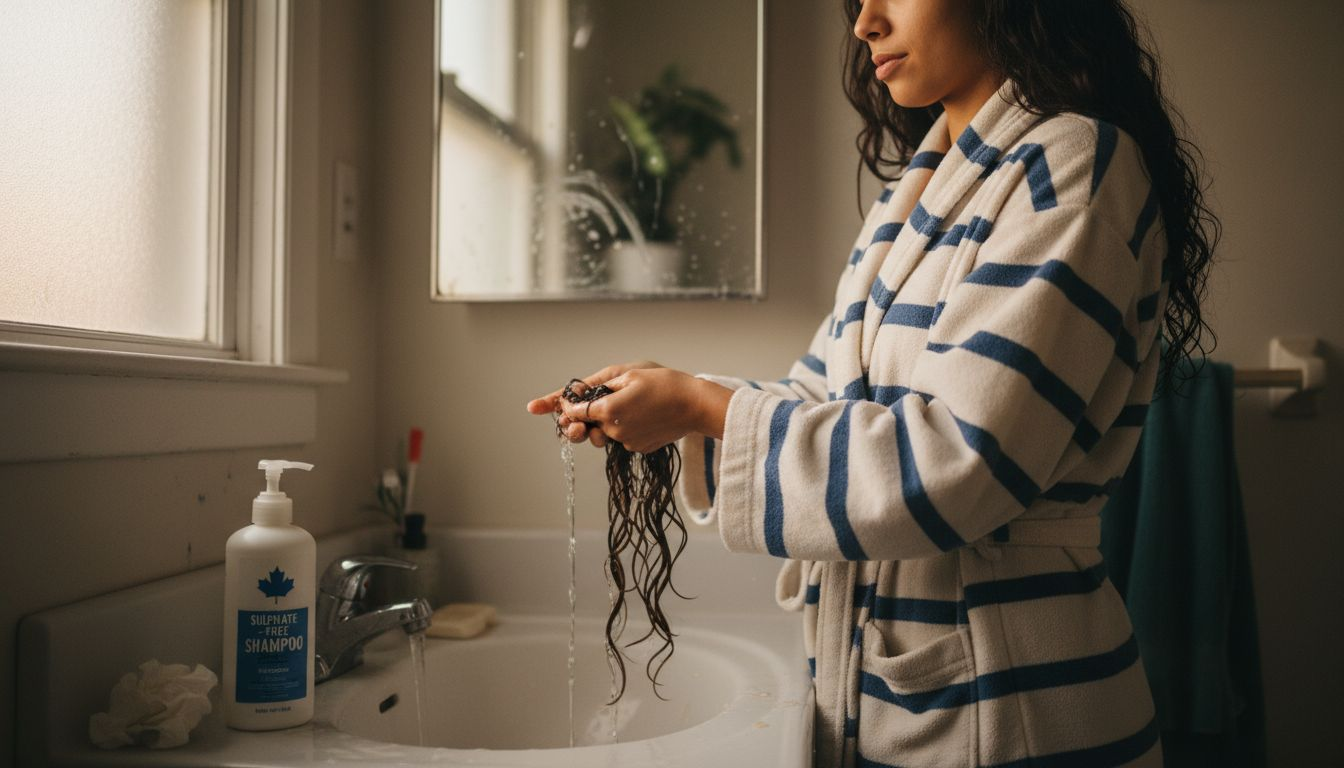
Start with thoroughly clean, completely dry hair. Wash 24 hours before installation using sulfate-free shampoo, then skip conditioner near the roots where you’ll attach extensions. Residue from styling products or natural oils weakens adhesive bonds and causes premature slippage. Detangle from ends to roots using a wide-tooth comb, removing every knot before sectioning.
Gather essential tools before touching your first weft. You need fine-tooth combs for precise sectioning, metal clips to hold hair divisions, a quality heat protectant spray, professional-grade adhesive remover, and extension-specific clips or tools matching your chosen method. Invest in a reliable flat iron or fusion tool with accurate temperature controls if you’re installing bonded extensions.
Choose certified virgin Indian hair for optimal results. Certified virgin Indian hair extensions maintain cuticle alignment, increasing durability and natural appearance by up to 60% versus synthetic options that tangle quickly and shed excessively. Virgin hair accepts heat styling, blends seamlessly with various textures, and lasts significantly longer when maintained properly. Before purchasing, verify the supplier provides authenticity certificates and clear origin documentation.
Essential Tools Comparison
| Tool | Primary Purpose | Cost Range | Necessity Level |
|---|---|---|---|
| Fine-tooth comb | Precise sectioning and parting | $5-15 | Critical |
| Sectioning clips | Hold hair divisions during install | $8-20 | Critical |
| Heat protectant spray | Shield hair from thermal damage | $10-25 | High |
| Adhesive remover | Safe tape-in or bond removal | $15-30 | Method-dependent |
| Fusion heat tool | Apply keratin bonds accurately | $80-200 | Fusion only |
| Extension brush | Gentle detangling without snagging | $12-28 | High |
Pro Tip: Lay out all tools and products within arm’s reach before beginning. Stopping mid-installation to search for supplies disrupts your sectioning pattern and risks uneven placement that creates visible bumps or gaps.
Understanding how to prepare your natural hair for extensions sets the foundation for success. Clean preparation eliminates 70% of common installation failures and protects your natural hair throughout the wearing period. Take time with this phase rather than rushing into application.
The benefits of Indian hair extensions become most apparent when you’ve prepped correctly. Quality hair paired with thorough preparation creates results indistinguishable from natural growth.
Step-by-Step Installation Methods for Indian Hair Extensions
Different extension types require distinct techniques. Choosing the right method for your lifestyle and skill level determines both satisfaction and longevity.
Tape-In Installation (1-2 Hours)
- Section hair horizontally from ear to ear, creating a clean part one inch above the nape.
- Take a thin subsection (half-inch width), sandwich it between two tape wefts placed one inch from the scalp.
- Press firmly for 10 seconds to activate adhesive, ensuring no gaps or bubbles form.
- Continue upward in horizontal rows, spacing each row 1-1.5 inches apart.
- Leave the top two inches of your crown free for natural coverage over extensions.
- Avoid washing for 48 hours post-installation to allow adhesive full curing time.
Tape-ins offer quick application and comfortable wear but require replacement every 6-8 weeks as natural hair grows.
Sew-In Weft Method (2-3 Hours)
- Create tight cornrow braids horizontally across your head, starting at the nape.
- Thread a curved needle with strong extension thread matching your hair color.
- Align the weft along the braid, then stitch through both the weft track and braid using a whip stitch.
- Keep stitches close (quarter-inch apart) for secure attachment without pulling.
- Repeat across each braid row, working upward toward your crown.
- Knot thread securely at each weft’s end, trimming excess close to the knot.
Sew-ins last 6-8 weeks before requiring adjustment as braids loosen. This method suits those wanting zero heat or adhesive contact.
Clip-In Extensions (15-30 Minutes)
- Section hair horizontally where you want volume or length.
- Tease roots lightly at the part line for better clip grip.
- Open clips on the weft, position the track against your scalp, then snap clips closed.
- Ensure clips sit flat against your head without pinching or gapping.
- Gently blend extension hair with your natural texture using fingers or a brush.
- Remove nightly to prevent scalp tension and prolong both clip and natural hair health.
Clip-ins provide instant transformation with zero damage risk, perfect for occasional wear or special events.
Fusion Method (3-4 Hours)
- Section hair into small subsections (pencil-width) starting at the nape.
- Heat the fusion tool to exactly 180°C, never exceeding this temperature.
- Place a keratin-tipped extension strand against a natural hair subsection.
- Apply the heated tool for 3-5 seconds, rolling the bond between your fingers to shape it.
- Allow each bond to cool completely (30 seconds) before releasing.
- Work upward in rows, placing bonds half-inch apart for natural movement.
Fusion bonds last 3-4 months but demand precise temperature control. Heat exceeding 180°C damages both extension and natural hair irreversibly.
Installation Method Comparison
| Method | Install Time | Typical Lifespan | Ease Level | Damage Risk |
|---|---|---|---|---|
| Tape-In | 1-2 hours | 6-8 weeks | Moderate | Low |
| Sew-In | 2-3 hours | 6-8 weeks | Difficult | Low-Moderate |
| Clip-In | 15-30 minutes | Removable daily | Easy | Very Low |
| Fusion | 3-4 hours | 3-4 months | Difficult | Moderate-High |
Pro Tip: Match your installation method to your daily routine. Active lifestyles suit sew-ins or tape-ins that withstand workouts and frequent washing. Occasional wearers benefit most from clip-ins that preserve natural hair between uses.
Professional installation satisfaction rates exceed 90%, highlighting how technique mastery impacts results. If you’re attempting your first install, consider booking one professional session to observe proper placement and tension before trying solo.
Exploring different types of hair extensions explained helps you select the best option. Quality fusion hair extension products combined with correct technique deliver seamless, long-lasting beauty.
Safety Considerations and Common Mistakes to Avoid
Installation errors damage your investment and natural hair. Recognizing risks beforehand protects both.
Never apply oil-based products near tape-in adhesive. Oils dissolve bonding agents within hours, causing extensions to slide down or detach completely. This includes leave-in conditioners, serums, and even natural scalp oils if you have an oily scalp type. Use only water-based or silicone-based products on mid-lengths and ends, keeping them away from attachment points.
Incorrect sectioning creates the most visible installation failures. Taking sections too thick makes extensions appear bulky and obvious. Sections too thin cause excessive tension on individual hair strands, leading to breakage and traction alopecia over time. Maintain consistent section width (half-inch for tape, pencil-width for fusion) throughout your entire head.
Fusion heat above 180°C increases hair shaft damage risk by 40%, weakening both natural and extension hair through protein degradation and moisture loss that becomes irreversible.
Bonded extension removal demands professional help or extreme caution. Pulling or cutting bonds rips out natural hair in clumps. Instead, apply specialized bond remover solution, wait the full recommended time (usually 5-10 minutes), then gently slide bonds off. Never force removal if resistance remains.
Monitor your scalp daily during the first week post-installation. Redness, soreness, or unusual hair shedding signals excessive tension or allergic reaction to adhesives. Address these symptoms immediately by loosening or removing problematic sections rather than waiting for damage to worsen.
Common Installation Mistakes and Corrections
- Placing extensions too close to the scalp (within half-inch): Creates painful pulling and visible bumps. Maintain minimum one-inch distance from roots.
- Overloading thin natural hair with heavy wefts: Causes breakage and traction alopecia. Match extension weight to your natural hair density.
- Ignoring hair growth patterns and natural part lines: Results in extensions that flip wrong direction. Always install following your natural hair flow.
- Using household tools instead of professional equipment: Leads to uneven heat distribution and bond failure. Invest in proper extension-specific tools.
- Skipping strand tests before full installation: Risks allergic reactions or adhesive incompatibility. Always test one small section 24 hours before full application.
Pro Tip: Document your installation with photos from multiple angles immediately after finishing. These reference images help you identify slippage or changes during wear and guide proper reinstallation positioning at your next appointment.
Understanding the importance of natural hair extensions includes recognizing safety priorities. Avoiding common extension mistakes preserves your natural hair health while maximizing extension lifespan.
Care and Maintenance Post-Installation
Proper aftercare separates extensions lasting months from those failing within weeks. Your maintenance routine directly impacts longevity and appearance.
Wash extensions gently using sulfate-free shampoo diluted with water. Apply shampoo primarily to your scalp and roots, allowing runoff to cleanse the lengths rather than scrubbing wefts directly. Aggressive washing tangles extension hair and loosens bonds or tape. Limit washing to 2-3 times weekly, using dry shampoo between washes to absorb oil without water exposure.
Brush extensions correctly to prevent matting. Start at the ends, holding the mid-lengths firmly while working out tangles. Progress upward in small sections rather than dragging a brush from roots to ends in one stroke. Use extension-safe brushes with flexible bristles that bend around bonds without catching. Brush morning and night, plus before washing, to maintain smoothness.
Minimize heat styling frequency and intensity. Excessive heat breaks down keratin bonds in fusion extensions and dries out all extension types faster than natural hair regrows oils. When heat styling is necessary, apply heat protectant thoroughly and keep tools below 180°C. Air-dry whenever possible, or use cool blow-dryer settings to reduce thermal stress.
Schedule professional touch-ups every 6-8 weeks for tape-ins and sew-ins, every 3-4 months for fusion bonds. Regular maintenance appointments prevent extensions from growing too far from your scalp, which creates tangling at the roots and visible demarcation lines. Professionals reposition grown-out extensions and assess natural hair health during these visits.
Daily and Weekly Maintenance Tasks
- Daily: Brush extensions gently twice (morning, bedtime), tie hair loosely before sleep, avoid touching or playing with bonds/tapes.
- Every 2-3 days: Wash using sulfate-free products, focusing on scalp only, rinse thoroughly with lukewarm water.
- Weekly: Deep condition mid-lengths and ends (avoiding attachment points), inspect bonds or tapes for loosening, trim any split ends carefully.
- Monthly: Professional assessment of installation integrity, natural hair health check, repositioning if needed.
Pro Tip: Braid extensions loosely or wrap them in a silk scarf before bed. This simple habit prevents nighttime friction against pillows that causes matting and premature wear, potentially extending lifespan by several weeks.
Following detailed hair extension maintenance tips maximizes your investment. Understanding key factors for extension longevity helps you avoid premature replacement costs while keeping extensions looking fresh throughout their entire wearing period.
Troubleshooting Installation Issues and Expected Outcomes
Even careful installation sometimes produces problems. Knowing how to identify and resolve issues quickly prevents minor concerns from becoming major failures.
Installation time varies significantly based on method and hair characteristics. Clip-ins take 15-30 minutes for full application. Tape-ins require 1-2 hours for a complete head. Sew-in wefts demand 2-3 hours including braiding time. Fusion installations span 3-4 hours due to individual strand application. Your natural hair density and extension amount also affect duration, with thicker hair requiring more time for thorough coverage.
Common installation mistakes reduce extension lifespan by up to 30% through improper tension, incorrect product use, and poor placement technique. Most failures stem from rushing the process or skipping preparation steps rather than product quality issues.
Sew-in wefts typically last 6-8 weeks before requiring adjustment. Natural hair growth loosens cornrow tension during this period, creating gaps between wefts and scalp. Waiting beyond eight weeks risks severe tangling at loosened braids and unnecessary stress on natural hair.
Satisfaction rates differ dramatically between professional and self-installation. Professional installation satisfaction rates exceed 90% compared to 65-70% for self-installation without guidance due to technique complexities and placement precision that experience provides. First-time installers benefit enormously from professional observation or hands-on guidance.
Installation Method Performance Data

| Method | Average Install Time | Expected Lifespan | Professional Satisfaction | DIY Satisfaction |
|---|---|---|---|---|
| Clip-In | 15-30 minutes | Removable | 85-90% | 80-85% |
| Tape-In | 1-2 hours | 6-8 weeks | 92-95% | 65-75% |
| Sew-In | 2-3 hours | 6-8 weeks | 90-93% | 60-70% |
| Fusion | 3-4 hours | 3-4 months | 93-96% | 55-65% |
Troubleshooting Common Problems
- Extensions slipping within days of install: Indicates oil contamination or insufficient adhesive curing time. Remove, clean natural hair thoroughly with clarifying shampoo, reinstall using fresh tape or bonds after 24-hour drying period.
- Visible bumps or lumps at attachment points: Results from taking sections too thick or placing extensions too close together. Remove problematic sections, create thinner subsections, increase spacing between placements.
- Extensions tangling excessively at roots: Signals installations growing too far from scalp or inadequate nightly brushing. Schedule immediate professional repositioning and implement twice-daily gentle brushing routine.
- Unnatural appearance or color mismatch: Occurs when extension texture or shade doesn’t blend with natural hair. Add subtle highlights to extensions matching your natural dimension, or blend textures using heat styling that matches your natural pattern.
- Scalp soreness or hair shedding: Indicates excessive tension from too-tight application. Immediately remove any painful sections and reinstall with looser tension, consulting a professional if soreness persists beyond 48 hours.
Realistically expect a learning curve with your first self-installation. Most people achieve satisfactory results by their second or third attempt as they develop feel for proper tension and placement. Starting with clip-ins provides risk-free practice before attempting permanent methods.
Consult the comprehensive Indian hair extension durability guide for detailed lifespan information. Setting appropriate extension lifespan expectations prevents disappointment and helps you plan maintenance schedules effectively.
Discover Premium Indian Hair Extensions at Gaurash Beauty Supply
Transform your look with confidence using authentic Indian hair extensions from Gaurash Beauty Supply. Our curated collection features certified virgin hair that maintains natural cuticle alignment for seamless blending and exceptional durability.
Every strand undergoes rigorous quality verification to ensure you receive unprocessed, tangle-free hair that accepts styling while lasting months longer than synthetic alternatives.
Whether you need tape-ins for quick transformation or fusion bonds for long-term wear, our range covers every installation method. Browse our selection of virgin Indian straight hair extensions that deliver salon-quality results at home. Explore detailed guides on types of hair extensions to find your perfect match. Access expert advice through our extension longevity tips to maximize your investment. Our customer support team stands ready to answer installation questions and recommend products matching your specific hair type and styling goals.
FAQ
Can I install Indian hair extensions myself, or should I seek professional help?
You can successfully install extensions yourself with careful preparation and adherence to technique guidelines, particularly for clip-ins and tape-ins. However, professional installation satisfaction exceeds 90%, while self-installation satisfaction tends to be 65-70% due to technique challenges. First-time installers benefit significantly from professional guidance or observation before attempting solo installations, especially for fusion or sew-in methods requiring precise tension control.
How do I prevent damage to my natural hair when using fusion extensions?
Maintain fusion heat strictly below 180°C throughout installation to protect hair integrity. Heat above 180°C during fusion installation increases hair damage risk by 40% through protein degradation that weakens strands permanently. Always apply heat protectant before bonding, use calibrated fusion tools with accurate temperature displays, and limit heat contact time to 3-5 seconds per bond while allowing complete cooling between applications.
What are the best practices for maintaining Indian hair extensions to last longer?
Wash extensions 2-3 times weekly using diluted sulfate-free shampoo applied primarily to your scalp rather than scrubbing wefts directly. Brush gently twice daily starting from ends and working upward, using extension-safe brushes with flexible bristles. Limit heat styling frequency and keep tools below 180°C when styling is necessary. Schedule professional touch-ups every 6-8 weeks for repositioning and integrity assessment, which extends overall lifespan by 20-40% compared to skipping maintenance appointments.
Recommended
- Why Indian Human Hair Extensions Are the Hottest Trend in 2025 – Gaurash Beauty Supply
- Straight Itip Hair Extensions | Indian Virgin I Tip Hair | Gaurash Beauty Supply
- Why Choose Indian Hair Extensions for Authenticity – Gaurash Beauty Supply
- Why Indian Hair Extensions Offer Unmatched Beauty – Gaurash Beauty Supply
- Biotin Boost Hair Serum – Didis Beauty Center