

How to cut hair extensions: Step-by-step tutorial for a natural look
You’ve invested in beautiful hair extensions, but they look bulky or uneven against your natural hair. The good news? Cutting and blending extensions at home is completely achievable with the right technique. This guide walks you through every step, from gathering your tools to troubleshooting common mistakes, so you can customise your extensions like a professional stylist. After reading, you’ll have the confidence and knowledge to create a seamless, natural look that turns heads for all the right reasons.
Table of Contents
- What you need before you start
- Understanding your hair extensions: Types and blending goals
- Step-by-step tutorial: Cutting hair extensions for a flawless look
- Troubleshooting: Fixing mistakes and common cutting issues
- Maintaining your cut: Aftercare and style tips
- Upgrade your extensions for even better results
- Frequently asked questions
Key Takeaways
| Point | Details |
|---|---|
| Proper tools matter | Investing in the right scissors and setup makes cutting extensions safer and simpler. |
| Match technique to extension | Adapting cutting and blending methods to your extension type improves comfort and natural appearance. |
| Trim gradually | Cut off a little at a time and check your progress to avoid mistakes. |
| Fixes are possible | Most common cutting errors can be fixed with blending and layering techniques. |
| Routine aftercare extends life | Caring for your cut extensions keeps them natural-looking and maximises their lifespan. |
What you need before you start
Before you pick up your scissors, let’s make sure you have everything you need for a safe and successful cut. Proper preparation prevents frustration and protects your investment in quality extensions.
Start by gathering sharp haircutting scissors, thinning shears, a wide-tooth comb, sectioning clips, and a spray bottle filled with water. Professional scissors make clean cuts without fraying, whilst thinning shears help blend layers naturally. A well-lit workspace with a large mirror allows you to see every angle clearly.
| Tool | Purpose | Why it matters |
|---|---|---|
| Sharp haircutting scissors | Clean, precise cuts | Prevents split ends and fraying |
| Thinning shears | Blending and texture | Creates seamless transitions |
| Wide-tooth comb | Detangling and sectioning | Reduces breakage during prep |
| Sectioning clips | Organising hair | Keeps work area manageable |
| Spray bottle | Dampening extensions | Controls flyaways for accuracy |
Different extension types may require specific approaches. Wet for precise lines, dry for natural texture; always choose according to your goal and extension type. Consider prepping your natural hair before installation to ensure the best foundation for blending.
Pro Tip: Always start with less cutting—you can take more off, but you can’t put it back. Begin conservatively and assess after each small trim.
Organise your tools within arm’s reach before beginning. This streamlines the process and prevents you from searching for scissors mid-cut, which can lead to uneven results.
Understanding your hair extensions: Types and blending goals
Now that your workspace and tools are ready, it’s time to understand which technique works best for your specific extensions. Each extension type has unique characteristics that influence how you should approach cutting and blending.
Clip-in extensions offer the most flexibility for home cutting since you can remove them easily and work on a flat surface. Tape-in extensions require more precision because they’re semi-permanent and sit closer to the scalp. Sew-in extensions demand advanced skills, whilst halo extensions need bulk reduction near the scalp for comfort and natural movement.
Your blending goals should focus on three priorities: creating seamless transitions between your natural hair and extensions, matching density throughout, and ensuring comfortable wear. Starting with extensions that closely match your natural hair colour and texture makes achieving these goals significantly easier.
| Extension type | Cutting difficulty | Key blending focus |
|---|---|---|
| Clip-in | Beginner-friendly | Layer matching and length |
| Tape-in | Intermediate | Root blending and density |
| Sew-in | Advanced | Perimeter softening |
| Halo | Intermediate | Crown volume reduction |
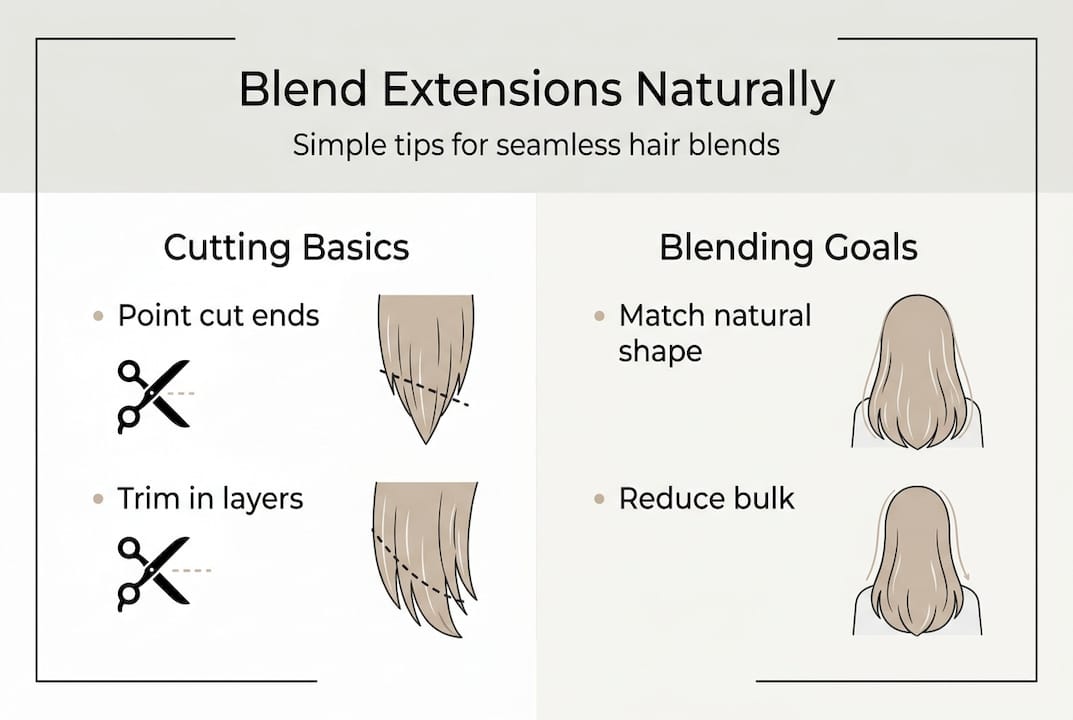
For clip-ins, focus on point cutting the ends to match your natural layers. Tape-ins benefit from thinning near the attachment points to reduce bulk. Sew-ins require careful perimeter work to avoid exposing tracks. Halo extensions need strategic thinning at the crown to prevent the telltale halo bump.
Explore different types of hair extensions to understand which method suits your lifestyle best. Master the art of blending extensions naturally by understanding your specific extension type’s requirements.
Step-by-step tutorial: Cutting hair extensions for a flawless look
With your game plan in place, let’s break down the actual cutting process into simple, manageable steps. Following this systematic approach ensures consistent, professional results.
-
Install your extensions properly according to the manufacturer’s instructions. Secure them firmly so they don’t shift during cutting.
-
Section your hair into manageable quadrants using clips. Work with one section at a time to maintain control and symmetry.
-
Dampen the extensions lightly if you’re aiming for precise, blunt lines. Leave them dry if you want added texture and a softer finish.
-
Hold the hair between your fingers at the desired cutting point. Always keep your fingers below the scissors for safety.
-
Use point cutting technique by holding scissors vertically and making small, upward cuts into the ends. This creates soft, natural-looking layers rather than blunt lines.
-
Check symmetry frequently by comparing both sides in the mirror. Step back every few cuts to assess the overall shape.
-
Blend with thinning shears if needed, focusing on areas where extensions meet your natural hair. Make cuts at least 5 centimetres from the roots.
-
Assess and refine by running your fingers through the hair. Look for any obvious lines or heavy spots that need additional blending.
Never cut above your fingers; always use professional scissors for accuracy. Household scissors crush hair fibres and create split ends that ruin the natural look you’re working to achieve.
Pro Tip: Cut extensions whilst wearing them for best results. This allows you to see exactly how they’ll fall and blend with your natural hair in real time.
Trim layers gradually and focus on reducing bulk near the scalp for both comfort and a natural look. Learn more about clip-in blending techniques and discover professional tips for styling virgin extensions after cutting.

Troubleshooting: Fixing mistakes and common cutting issues
Even with careful steps, slip-ups can happen. Here’s how to solve the most common issues before they become visible problems.
Uneven ends are the most frequent complaint. Fix them by dampening the hair, combing it straight, and carefully trimming the longer pieces to match the shortest length. Work in small increments to avoid over-correcting.
Overly blunt cuts look unnatural and obvious. Soften them by using your thinning shears at a 45-degree angle, making several passes through the ends. This breaks up the harsh line without removing significant length.
Loss of layering happens when you cut too much at once. Restore dimension by point cutting at varying depths throughout the mid-lengths and ends. Focus on creating movement rather than uniform length.
- Mistake 1: Cutting too much at once — Always trim conservatively. Take off 1 centimetre, assess, then continue if needed.
- Mistake 2: Using dull scissors — Invest in professional shears and have them sharpened regularly for clean cuts.
- Mistake 3: Ignoring your natural hair pattern — Cut extensions to complement your natural texture, not fight against it.
When extensions feel bulky or uncomfortable, reduce bulk near the scalp for comfort and blending. This fixes common complaints about visible attachment points.
If you’ve over-cut and the extensions are noticeably shorter than desired, you have two options: trim your natural hair to match, or add new hairpieces to fill the gap. Severe cases may require professional intervention, so know when to seek help rather than making the problem worse.
Learn how to maximise extension longevity and understand salon extension methods for complex corrections.
Maintaining your cut: Aftercare and style tips
With your extensions blended and cut just right, caring for them properly will keep them looking fabulous for weeks to come. Proper maintenance extends the life of both your cut and your investment.
Wash extensions gently using sulphate-free shampoo and always apply conditioner from mid-lengths to ends, avoiding the attachment points. This prevents loosening whilst keeping the hair soft and manageable. Pat dry with a microfibre towel rather than rubbing, which causes frizz and disrupts your carefully crafted layers.
Heat protection is non-negotiable. Apply a thermal spray before using any hot tools, and keep temperatures below 180°C to prevent damage. Proper aftercare extends extension life and keeps the cut blending naturally with your hair.
Re-trim your extensions every 6-8 weeks, or whenever you notice the ends looking ragged or the blend becoming less seamless. Regular touch-ups maintain the shape and prevent small issues from becoming major problems.
- Brush from ends upwards using a loop brush designed for extensions, working out tangles gently without pulling.
- Sleep in a loose plait to prevent tangling and maintain your style overnight.
- Store clip-ins properly by hanging them or laying them flat in their original packaging when not in use.
- Avoid chlorine and salt water which dry out extensions and cause colour fading.
- Deep condition monthly to restore moisture and keep the hair looking fresh and healthy.
Pro Tip: Always brush ends gently to prevent splitting. Extensions can’t repair themselves like natural hair, so prevention is your best strategy.
Discover how choosing quality extensions impacts maintenance requirements and explore ways to express personal style with extensions whilst keeping them healthy.
Upgrade your extensions for even better results
Now that you know how to cut and blend like a professional, the quality of your extensions can make all the difference. High-grade, 100% human hair responds better to cutting, holds styles longer, and blends more naturally than synthetic alternatives.
Premium extensions from Gaurash Beauty Supply offer the perfect canvas for your new cutting skills. When you start with virgin Indian hair that’s never been chemically processed, you get consistent texture throughout, which means predictable results every time you trim or style.

Whether you prefer sleek premium straight hair extensions or natural wavy human hair bundles, investing in quality means easier cutting, better blending, and longer-lasting results. The difference becomes obvious the first time you run your scissors through truly premium hair.
Explore the full range at Gaurash Beauty Supply and discover how starting with exceptional hair makes every step of the cutting and styling process more enjoyable and successful.
Frequently asked questions
Can I cut hair extensions by myself at home?
Yes, with the right tools and a step-by-step approach, anyone can cut extensions at home for a natural look. Start conservatively and work gradually for best results.
Should I cut extensions wet or dry for best results?
Cut wet for crisp, blunt lines or dry for added texture and blending, depending on your styling goal. Wet cutting offers more precision whilst dry cutting shows immediate results.
How do I fix extensions if I cut them too short?
You can blend the extensions further or trim your own hair to match, but severe cases may require adding new hairpieces. Prevention through conservative cutting is always easier than correction.
How often should I re-trim cut extensions?
Re-trim every 6-8 weeks, or as needed based on wear and styling to maintain the desired shape. Regular touch-ups keep extensions looking natural and healthy.
Are some extension types easier to cut and blend than others?
Clip-ins are generally easiest for home cuts, whilst tape-ins and sew-ins often need more skill for a seamless finish. Different methods require different techniques and effort levels.
Recommended
- Prepare Natural Hair for Extensions: Step-by-Step Guide – Gaurash Beauty Supply
- 7 Types of Hair Extensions for a Natural Look Explained – Gaurash Beauty Supply
- How to blend hair extensions for a natural look in 2026 – Gaurash Beauty Supply
- How to Choose Hair Extensions for a Natural, Lasting Look – Gaurash Beauty Supply
- How to Choose Hair Extensions for Luxurious Style - Joel C Ma Hair Studio