

Salon hair extension tips for flawless, natural results
TL;DR:
- Choosing high-quality human hair extensions ensures natural movement and longevity.
- Proper professional installation and blending techniques are key to achieving a seamless, natural look.
- Consistent aftercare, including gentle brushing and sulfates-free products, extends extension lifespan.
Getting hair extensions that look genuinely natural is harder than most people expect. Walk into any salon and you’ll find a dizzying array of options: clip-ins, tape-ins, sew-ins, bundles, and everything in between. The wrong choice can mean visible wefts, mismatched colour, or worse, real damage to your natural hair. This guide cuts through the noise with salon-tested advice on selecting, installing, blending, and maintaining extensions so they look like they actually grew from your scalp. Whether you’re a first-timer or someone who’s been struggling with a less-than-perfect result, these insider techniques will change how you approach the process entirely.
Table of Contents
- How to choose the best hair extension type for salon results
- Salon installation tips: Professional methods and DIY tricks
- Blending extensions for a flawless, natural look
- Maintaining extensions: Salon aftercare and longevity secrets
- The truth behind effortless salon extensions: What most miss
- Elevate your salon hair extension experience with premium options
- Frequently asked questions
Key Takeaways
| Point | Details |
|---|---|
| Choose high-quality hair | Investing in premium extensions ensures a longer-lasting, salon-worthy result regardless of hair type. |
| Professional installation matters | Semi-permanent extension methods work best when installed by a stylist to avoid breakage and ensure a seamless look. |
| Blending is crucial | Styling and layering extensions together with your own hair creates a truly natural, undetectable finish. |
| Prioritise aftercare | Regular maintenance and gentle products extend the life and beauty of your salon extensions. |
How to choose the best hair extension type for salon results
Choosing the right extension type is the single most important decision you’ll make in this whole process. Get it wrong and no amount of blending or aftercare will save you. Get it right and the rest falls into place naturally.
The two broad categories are human hair and synthetic hair. Human hair, particularly Remy human hair where the cuticles are aligned in one direction, behaves exactly like your own hair. You can wash it, heat-style it, colour it, and it moves with you. Synthetic hair is lighter on the wallet but far more limited. It cannot handle heat styling and tends to look noticeably artificial under bright light. Quality Remy human hair lasts 9-12 months with proper care, while synthetic options are cheaper but cannot be heat-styled and offer far less versatility.
Beyond material, you need to think about your lifestyle. If you swim regularly, train at the gym, or simply don’t want a complicated morning routine, lightweight clip-ins might be your best match. If you want something you can forget about for weeks at a time, tape-ins or sew-ins offer that semi-permanent convenience. When choosing extension types, always factor in your natural hair’s thickness, texture, and overall health before committing.
Here’s a quick breakdown of the most common options:
- Clip-ins: Easy to apply and remove at home; ideal for beginners and occasional wear
- Tape-ins: Flat and discreet; great for fine to medium hair; require salon application every 6-8 weeks
- Sew-ins/weaves: Long-lasting and secure; best for thicker or textured hair; need professional installation
- Fusion/bonded: Very natural movement; time-intensive to apply and remove; suited for experienced stylists
| Extension type | Longevity | Heat styling | Best for |
|---|---|---|---|
| Remy human hair | 9-12 months | Yes | All hair types |
| Synthetic | 2-3 months | No | Budget-conscious, occasional use |
| Tape-in | 6-8 weeks per move-up | Yes (human hair) | Fine to medium hair |
| Sew-in | 6-10 weeks | Yes (human hair) | Thick or textured hair |
For a full comparison of extension methods, it helps to see all options side by side before booking your salon appointment.
Pro Tip: Always invest in the highest-grade human hair you can afford. The difference in how naturally it moves, reflects light, and holds a style is immediately visible and absolutely worth it.
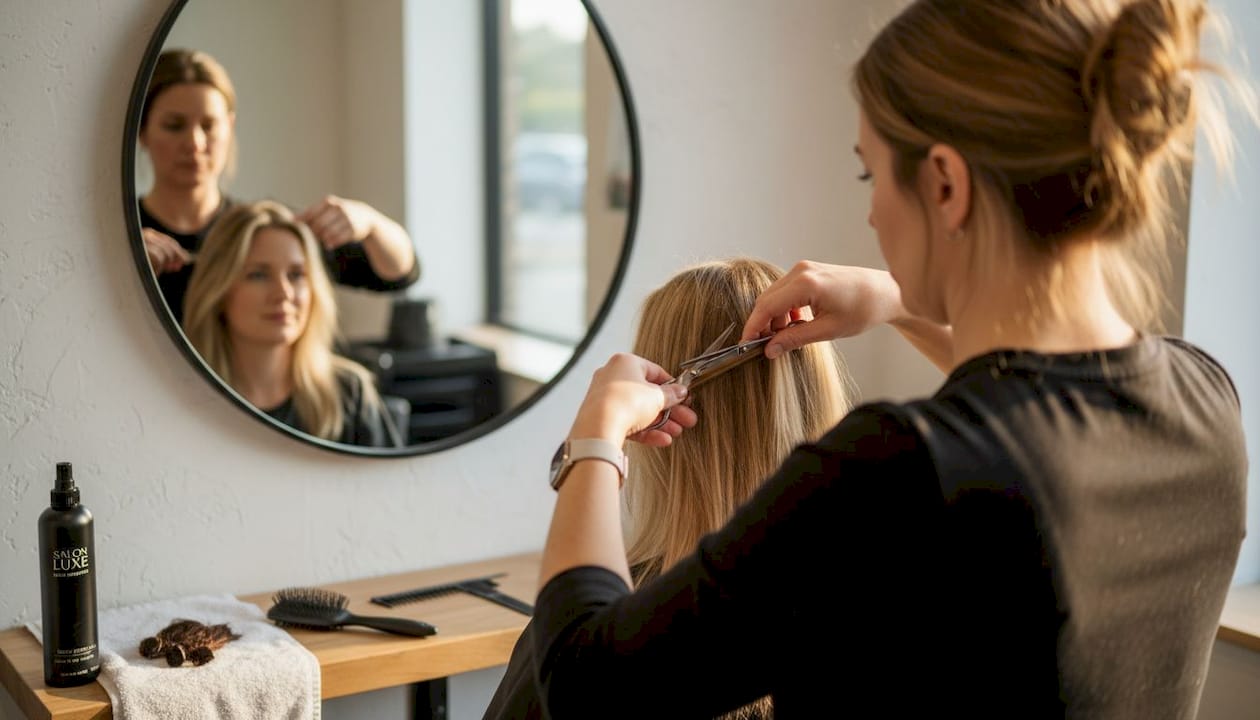
Salon installation tips: Professional methods and DIY tricks
With your extension type chosen, it’s time to tackle professional installation and expert DIY approaches. How you install extensions matters just as much as what you install.
For semi-permanent methods like tape-ins, sew-ins, and fusion bonds, professional installation is non-negotiable. These methods sit close to the scalp and, if applied incorrectly, can cause traction alopecia (hair loss caused by prolonged tension on the roots) or irreversible damage to the hair shaft. Prioritise professional installation for semi-permanent methods to avoid damage, and for DIY clip-ins, practise sectioning and teasing before your first real attempt.
If you’re going the DIY route with clip-ins, here’s a reliable step-by-step process:
- Section your hair: Start at the nape of your neck and work upward in clean horizontal sections. Use a tail comb for precision.
- Tease the roots: Lightly backcomb each section at the root before clipping. This gives the weft something to grip and prevents slipping.
- Clip and secure: Snap the weft clips into the teased section firmly. Press each clip flat against the scalp.
- Layer and blend: Let down the next section of your natural hair to cover the weft. Repeat until you’ve built your desired volume.
- Style together: Curl or straighten both your natural hair and extensions simultaneously so the textures merge seamlessly.
A common mistake is placing wefts too high on the head, which makes them visible when you pull your hair up or back. Always keep wefts at least two centimetres from the hairline.
“The biggest error I see is people skipping the consultation. Know your hair’s condition before anything goes in.” — salon professional advice echoed across the industry
Before you leave the salon, ask specifically about aftercare. Understanding clip-ins vs bundles and preparing your hair beforehand makes the installation process smoother and the results last longer. For clients dealing with thinning at the scalp, professional hair restoration treatments can complement extension work by improving the underlying hair density.
Pro Tip: Ask your stylist to walk you through the removal process before you leave the salon. Knowing how to safely take extensions out at home prevents panic and accidental breakage later.
Blending extensions for a flawless, natural look
Once extensions are installed, blending is the next crucial step for achieving a salon-quality finish. Even the most expensive extensions will look fake if they aren’t properly integrated with your natural hair.
The most effective blending technique is styling both your natural hair and extensions at the same time. Blend by styling natural hair and extensions together using curls or waves, and layer extensions professionally for a seamless look. When you curl both simultaneously, the heat creates a unified texture that makes it nearly impossible to tell where your natural hair ends and the extension begins.
Colour matching is equally critical. Extensions that are even one or two shades off will catch the eye immediately, especially in natural light. If you can’t find an exact match, opt for extensions that are very slightly lighter than your natural colour. A good stylist can tone them down, but it’s much harder to lift extensions that are too dark.
Here are the key blending strategies used in professional salons:
- Layered cutting: Have a stylist cut the extensions while they’re installed to create a customised shape that suits your face and natural hair length
- Curling and waving: Use a medium-barrel curling iron on both natural hair and extensions to unify texture
- Colour blending: Consider highlights or lowlights on your natural hair to create a gradient that transitions smoothly into the extension colour
- Feathering: Ask your stylist to point-cut the ends of the extensions to soften any blunt lines
For more detailed blending extension tips, technique matters as much as product. And if you’re considering trimming your extensions yourself, follow a precise cutting tutorial to avoid uneven results.
| Blending technique | Salon success rate | DIY success rate | Longevity of result |
|---|---|---|---|
| Professional layered cut | 95% | 55% | 8-12 weeks |
| Curl/wave styling | 90% | 80% | 1-3 days |
| Colour matching | 92% | 60% | Permanent until regrowth |
| Feathering/point cutting | 88% | 45% | 6-10 weeks |
“Extensions should disappear into your hair, not announce themselves. The goal is always invisibility.” — a principle every professional colourist and extension specialist lives by
Maintaining extensions: Salon aftercare and longevity secrets
Even after a perfect blend, ongoing care is what keeps extensions looking fresh and natural for months. Neglect is the fastest way to ruin a great installation.
Extensions can improve natural hair health if they are lightweight, high-quality, and properly maintained, according to celebrity hair experts. That’s a remarkable upside, but it only holds true when you follow a consistent care routine.
Here’s what a solid maintenance routine looks like:
- Daily: Brush extensions gently from ends to roots using a soft-bristle or loop brush. Never brush from root to tip as this causes matting and stress on the bonds.
- Washing: Wash 2-3 times per week maximum. Use sulphate-free shampoo and conditioner, applying conditioner only from mid-length to ends, never at the roots near bonds or tapes.
- Drying: Always dry extensions thoroughly before sleeping. Sleeping on wet extensions is a leading cause of matting and mildew in the wefts.
- Sleeping: Braid or loosely tie extensions before bed to prevent tangling overnight. A silk or satin pillowcase reduces friction significantly.
- Heat styling: Use a heat protectant every single time. Keep tools below 180 degrees Celsius to preserve the hair’s integrity.
For more extension longevity tips, the difference between extensions that last three months and those that last a full year often comes down to these small daily habits. Understanding the advantages of natural extensions also helps you appreciate why investing in quality upfront pays off in the long run. For a broader look at top-rated aftercare products, extension care recommendations from industry experts are a reliable starting point.
Pro Tip: Use sulphate-free products exclusively and detangle with a wide-tooth comb or loop brush starting from the ends. This single habit alone can add months to your extension’s lifespan.
The truth behind effortless salon extensions: What most miss
Here’s something most extension guides won’t tell you: the majority of extension failures have nothing to do with the hair itself. They happen because of rushed decisions, poor matching, and skipped consultations.
We’ve seen clients come in with expensive extensions that look terrible because nobody assessed their natural hair first. For fine or thin hair, lighter methods like clip-ins or tape-ins combined with teasing work best, while textured hair suits sew-ins or curl-matched extensions. Ignoring this basic principle leads to visible damage, breakage, and disappointment.
Salon guidance transforms outcomes not because stylists have magic hands, but because they assess your hair’s actual condition, elasticity, and density before recommending anything. That assessment changes everything. A thorough consultation before choosing your extension type is the single most underrated step in the entire process.
For clients also exploring scalp health alongside extensions, hair filler treatments can address underlying thinning that affects how extensions sit and blend. The bottom line: slow down, get assessed, and invest in the right match. Effortless extensions are always the result of careful groundwork.
Elevate your salon hair extension experience with premium options
Armed with professional tips and a clearer perspective, the next step is choosing extensions that actually deliver on the promise of salon-quality results.
At Gaurash Hair, every product is crafted from 100% raw and virgin Indian human hair, ethically sourced and completely unprocessed. Whether you’re after sleek straight human hair extensions, voluminous wavy hair bundles, or defined curly hair bundles, you’ll find options that blend naturally, hold a style beautifully, and last well beyond what most extensions promise. Fast global shipping, bundle deals, and dedicated product support make the experience as seamless as the results.
Frequently asked questions
How long do salon-installed hair extensions last?
Remy human hair extensions last 9-12 months with consistent, proper care, while synthetic extensions typically need replacing within two to three months.
What is the safest salon method for fine or thin hair?
Tape-in or clip-in extensions are the safest choice for fine hair, particularly when lighter methods with teasing are used to minimise tension on delicate strands.
Can salon hair extensions improve my natural hair health?
Yes, when extensions are lightweight, high-quality, and properly maintained per expert advice, they can actually protect your natural hair and support healthier growth over time.
What is the best way to blend extensions for a seamless finish?
Curl or wave your natural hair and extensions simultaneously, and have a stylist layer extensions professionally to create a finish that looks completely undetectable.
Recommended
- How to Choose Hair Extensions for a Natural, Lasting Look – Gaurash Beauty Supply
- Prepare Natural Hair for Extensions: Step-by-Step Guide – Gaurash Beauty Supply
- How to cut hair extensions: Step-by-step tutorial for a natural look – Gaurash Beauty Supply
- Top Hair Extension Longevity Tips for Lasting Results – Gaurash Beauty Supply
- Natural Aesthetics: Subtle Enhancements, Lasting Confidence